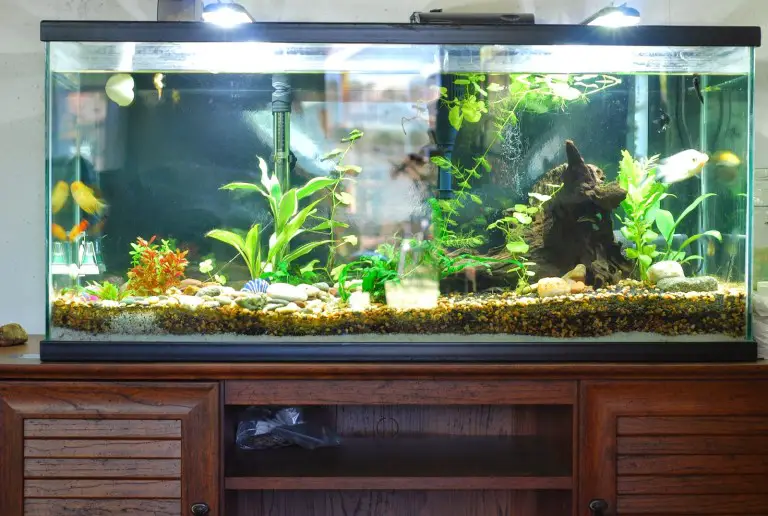
Starting the aquarium correctly allows you to create optimal living conditions for flora and fauna. Pouring tap water into a glass container and dropping the purchased fish has nothing to do with starting correctly.
To get a good result the first time, you need to divide the work into stages, each of which has its own nuances. This process is not difficult for a beginner, given the advice of experienced aquarists.

Table of Contents
First step to write down parameters for aquarium setup
Here it is important to take a pen and a notebook, where to write down the main parameters:
- the volume of the aquarium;
- the number of fish and their types;
- vegetation;
- other inhabitants, including snails;
- the presence of light and filter;
- type of soil.
It is not recommended for people who have not previously encountered the maintenance of an aquarium to purchase containers of more than 45 liters. The same applies to fish. The simpler and friendlier they are, the better.
Where should a fish tank be placed?
You need to choose a place in the house that would correspond to the following parameters:
- Moving away from a heat source (batteries, radiators, heaters) – in winter, fish and face discomfort due to an increase in temperature.
- The most shaded place away from the window and sources of artificial lighting – the sun’s rays provoke the formation of algae and pathogenic flora in the aquarium.
- Reliability of construction – the aquarium should stand steadily on a flat surface, which will be specially allocated for it. The surfaces of a dresser, wardrobe, dressing table and other frequently used interior items are not suitable.
- Accessibility and ease of maintenance – there must be good access to the aquarium so that you can feed the living creatures or perform a water change at any time.
- Remoteness from frequently walked places in the room, so that people inadvertently do not overturn or break an artificial reservoir.
Before sending the aquarium to its permanent location, it should be processed. Experts recommend using baking soda and a washcloth to safely remove harmful microorganisms. After treatment, the aquarium should be thoroughly rinsed with running water.
check hardness of aquarium
It’s a shame when the aquarium is fully loaded, and for 2-3 days a wet spot is visible from under its bottom, which was definitely not there when checking in the store. You will have to perform all the manipulations in the reverse order, and this is strength, time, and nerves. Experienced aquarists advise to always check the glass tank for leaks. This is done as follows:
- The aquarium is filled to 1/3 with water, allowed to stand for 2-3 hours, the result is checked at the seams.
- Add water to the maximum mark and leave for another 5 hours.
- For maximum load, a lid or a sheet of glass with a liter can of water is placed on top.
Particular attention is paid to joints and seams. They can only skip when the aquarium is fully loaded, and they will not show this when checking in the store. If there is no leak, you can drain the water and proceed to the next step.
Preparaing and laying of soil in aquarium
After opening the package, the pebbles are poured into a deep container and placed under the pressure of water. Rinse thoroughly, draining the liquid 10-15 times.
The soil must be mixed well by hand. As soon as the water becomes clear, it means that it is ready for styling.
Usually, aquarium substrates are ready to use without prior disinfection. If in doubt, you can fill it with water after rinsing by adding 2-3 tablespoons of peroxide. Let stand for 3-4 hours, then drain the water.

Ground laying is carried out sequentially:
- The distribution of the substrate (nutrient substrate) – is used if there are plants with a developed root system that need mineral fertilizing. If there are few plants, then the substrate is laid only in those places where they will be planted.
- Laying the ground directly – gently pour pebbles in small portions into different parts of the bottom, leveling the surface with your hand. If there is a lot of soil, you can make beautiful embankments in which to put the decor.
The minimum thickness of the soil should be 4 cm. This is quite enough for the formation of the bottom, as well as strengthening the rhizomes of plants. In a place as close as possible to the filter, the thickness is reduced to 1-2 cm so that the fine-grained soil is not sucked into the cleaner.
aquarium decorations
It is important to observe the main rule here: a lot does not mean beautiful! First of all, the fish should be comfortable and free. A few tips from the experts:
- The total area of the decor should occupy no more than 1/20 of the bottom area.
- Avoid pointed objects that can injure fish.
- Do not use houses and towers with windows or other openings. Bottom fish willingly swim in them and get stuck.
- Only buy decorative items that are intended for use in aquariums.
- Driftwood and natural ingredients are susceptible to decay and the development of pathogenic flora on them. The water will have to be changed more often, and air conditioners are indispensable.
To emphasize the uniqueness of the coloring of decorative fish, you need to glue the background. In pet stores, you can choose a lot of solutions that will showcase the inhabitants of the aquarium. The printed film is glued to the outer part of the back wall, the edges are neatly trimmed.
Main equipment needed for fish tank
If the aquarium is more than 10 liters in volume, then such devices will definitely be required that will form the most optimal microclimate:
- Filter and Compressor – Helps purify water by removing bottom sludge and increasing oxygen content. When choosing, you should take into account the throughput, which is selected for aquariums of various capacities.
- Lighting – water lamps are suctioned to the bottom or back of the aquarium. Surface lighting is installed on the aquarium lid so that no water gets on the device.
- Thermostat – controls the temperature of the water and starts the heating process, if necessary.
All devices operate on the network, so experts advise allocating a separate outlet where all the plugs would fit.
Filling water in aquarium
Before pouring some of the water into the aquarium, you must first prepare it. If the water from the tap is soft, then you can use it, but only settled for 1-2 days. This is necessary so that chlorine evaporates, which in large quantities is dangerous for flora and fauna.
A saucer is placed at the bottom of the aquarium, onto which water should be poured. This will prevent the jet from breaking the bottom structure. The aquarium needs to be filled to half its volume.
Air bubbles will form on the walls – this is not scary. They will disappear in a few hours.
aquarium plants for beginners
Long plants with a well-developed root system are best planted under the back of the aquarium so as not to obstruct the movement of fish.

For beginner aquarists, the following are suitable:
- pistia
- hornwort
- lemongrass
- vallisneria
These plants are unpretentious in care, grow relatively quickly and absorb phosphates with nitrates no worse than their expensive counterparts.
In order for the plant to quickly take root in a new place, you first need to:
- Carry out disinfection (a mandatory step) – add 2-3 tablespoons of hydrogen peroxide to a basin of water, place plants with roots for 15-20 minutes.
- Examine the roots and leaves for rot and dead leaves – remove all unnecessary elements with scissors.
- Plant the bushes, forming the interior of the aquarium – with one hand you should hold the bush, bringing the roots closer to the ground. With the other hand, gently push back the top fill layer and distribute the roots evenly over the soil. Sprinkle with soil, if necessary, overlay with large stones near the growth point, without overlapping it.
When the procedure is done, the water may become cloudy. The bottom layer of the soil, in which the plant roots were planted, is to blame. After 2-3 hours, this defect will disappear on its own.
After planting the plants, the water is added and the lighting is turned on to a minimum. In the subsequent time, the aquarium will mature, namely, the growth of useful flora, which will make the living conditions for fish and plants as comfortable as possible.
Aquarium Maturation Freshwater
The aquarium must go through a full nitrogen cycle, which is necessary for the normalization of the bioflora. Without this factor, it is impossible to plant fish and other inhabitants, as they may die.
Necessary:
- Maintain light mode for at least 8 hours.
- Leave the aquarium alone for 20 days.
- Check the condition of the water every 2-3 days. The appearance of green plaque indicates an excess of bacteria, which is important to control with the help of special means.
To avoid the rapid growth of flora, you need to completely turn off the light for a day once every 5 days. Usually, when there is a lack of lighting, the balance evens out on its own.
If it is not possible to wait so long, you can stimulate the growth of flora with the help of special preparations. They come in liquid or tablet form. When placed in an aquarium, they are quickly activated and help maintain bio balance.
During ripening, it is prohibited:
- change water;
- include a filter;
- turn off the light for more than 24 hours;
- siphon the bottom;
- planting fish in the first 7 days;
- add water to the required level.
Be patient. The better the flora is formed, the easier the aquarium is to maintain.
Introducing fish in aquarium
It is recommended to disembark the first inhabitants on the 10-12th day of the maturation of the aquarium. After a week, the population is increased, and after another week, the process can be completely completed. They do it according to the rules:
- The bag with the fish is carefully untied, saturating it with oxygen.
- Drain part of the water, adding the same amount of water from the aquarium.
- After an hour, part of the water is again drained and the aquarium water is added.
When the water in the package is only aquarium water and the fish get used to it, they can be planted in a new house using a landing net.
It is recommended to change the water in the aquarium and carry out routine cleaning no sooner than 2 weeks after the landing of the fish. If the water becomes noticeably cloudy, a green coating appears on the walls, then the forced cleaning is carried out according to all the rules.
To avoid an outbreak of bacterial growth, the amount of feed added must be controlled. In the first week, it is better to use ice cream or plate. They are absorbed faster without decomposing at the bottom.
After disembarking the fish, the filter and compressor are turned on. The contaminated bottom can be siphoned off, and then the missing part of the water can be refilled.
Aquarium Expert Advice and Tips & Tricks
For the first launch to be correct and successful, follow these tips:
- Choose the most unpretentious plants and fish species that can adapt to new environmental conditions.
- Don’t ignore disinfecting anything that goes into the aquarium.
- If a green bloom appears, lower the water temperature, remove the light and add a special agent to the water that will even out the biobalance of the flora.
- Avoid using plant fertilizers for the first 2-3 months.
- Control the amount of feed, do not let it rot at the bottom.
- Be sure to add snails to help with the green algae. Shrimp and bottom fish will be able to remove silt by absorbing food debris.
- Do not use freshly drawn tap water. This will destroy vegetation and slow down the formation of the desired flora.
In conclusion, it is important to note that the aquarium should be fun, and caring for it was not a burden. Compliance with all the tips will allow you to quickly form the necessary microflora, which will contribute to the active life of all inhabitants of an artificial reservoir.
If it is impossible to wait 2-3 weeks, special bioactivators help to speed up the process. With their help, fish can be launched in 2-3 days.